3-Day Ceramic Tile Install in Camps Bay Pros
Nestled between ocean and mountain, Camps Bay is the perfect backdrop for a home transformation. Do you know that in just three days, a professional ceramic tile installation project can bring fresh style, durability, and coastal charm to your residence? This is more than enough proof that expert craftsmanship can completely redefine a space in record time.
Key Takeaways: Ceramic Tile Install in Camps Bay
- A professional ceramic tile installation in Camps Bay can realistically be completed in 3 structured days — from surface prep to final grout sealing.
- Camps Bay’s coastal climate creates unique challenges for tile adhesion and grout longevity that most DIYers don’t account for.
- Skipping waterproofing membranes in wet areas is the single most expensive mistake Camps Bay homeowners make during tile installations.
- The right adhesive choice for coastal conditions can be the difference between tiles that last 20 years and tiles that lift within 18 months.
- LTCape Flooring is a vetted, certified tiling contractor who understand the specific demands of coastal Cape Town properties.
Fresh ceramic tiles can completely transform a Camps Bay home — but only if the installation is done right from day one.
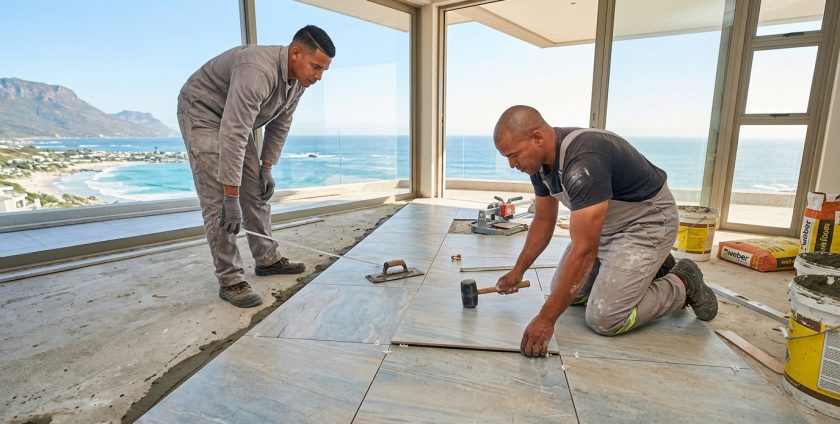
A 3-Day Ceramic Tile Install in Camps Bay Is Completely Achievable
The 3-Day Ceramic Tile Installation Timeline at a Glance
Day 1 — Surface Preparation & Layout Planning: Substrate inspection, crack and damp repairs, waterproofing membrane application in wet areas, tile layout planning, and reference line marking.
Day 2 — Tile Installation: Adhesive mixing and application, precision tile cutting, placement, leveling, and full pattern alignment across the installation area.
Day 3 — Grouting, Sealing & Finishing: Grout selection and application, joint finishing, surface cleanup, grout sealing, and final inspection.
Three days is not a rushed timeline, it’s the result of proper planning. Professional tilers in Camps Bay who follow a structured process consistently deliver clean, lasting results within this window for standard residential spaces. The key is that each day has a defined purpose, and no stage begins before the previous one is properly complete.
Why Camps Bay Homes Need Professional Ceramic Tile Installation
Camps Bay isn’t a typical inland suburb, and its homes shouldn’t be treated like one. Positioned directly on the Atlantic seaboard, properties here face a combination of sea salt air, high humidity fluctuations, and coastal wind exposure that puts significant stress on building material, including tiled surfaces. What works perfectly in a Johannesburg townhouse can fail surprisingly fast in a Camps Bay beachfront home.
- Salt-laden air accelerates grout degradation, especially in poorly ventilated bathrooms
- Humidity swings between hot dry summers and wet Cape winters cause substrate movement
- Many Camps Bay homes are built on sloped terrain, creating uneven substrate conditions
- Older properties common in the area often have legacy waterproofing issues that affect tile bonding
- High-end finishes expected in Camps Bay homes demand precision cutting and layout planning that amateur installations rarely achieve
These aren’t reasons to avoid tiling — they’re reasons to do it properly. A professional tiler with coastal experience brings product knowledge and technique that directly addresses each of these variables before a single tile goes down.
The Coastal Environment Demands the Right Tile Choices
A ceramic tile install in Camps Bay is an excellent choice because they are naturally resistant to moisture and don’t warp the way timber finishes can in coastal humidity. However, not all ceramic tiles are created equal. Tiles with a water absorption rate below 3% (classified as Group BIb or lower under ISO 13006) perform significantly better in high-humidity coastal environments. Glazed ceramic tiles also provide an additional barrier against salt air penetration compared to unglazed options, making them particularly well-suited for bathrooms, kitchens, and outdoor-adjacent spaces common in Camps Bay properties.
Common Tiling Mistakes Camps Bay Homeowners Make
Whether it’s a budget-driven DIY attempt or hiring an underqualified contractor, these are the errors that consistently show upwhen it comes to ceramic tile install in Camps Bay;
- Using standard interior adhesive instead of a flexible, moisture-resistant adhesive rated for coastal conditions
- Skipping the waterproofing membrane entirely in bathrooms and wet rooms
- Failing to account for substrate movement by omitting expansion joints at walls and transitions
- Poor surface leveling, leaving hollow spots beneath tiles that crack under foot traffic
- Using unsanded grout in joints wider than 3mm, which leads to premature cracking
- Not sealing grout after installation, leaving it exposed to salt moisture and staining
Each of these mistakes carries a real cost. Hollow tiles crack. Unsealed grout turns black with mould within months in a coastal bathroom. Tiles installed over an unrepaired damp substrate will lift — sometimes within a single Cape winter. The repair bill for a failed installation almost always exceeds what proper professional installation would have cost upfront.
How Professional Tilers Protect Your Investment
A qualified tiler doesn’t just lay tiles — they engineer the entire surface system beneath them. This means assessing the substrate for structural integrity, applying the correct primer and bonding agents, installing waterproofing membranes where required, and selecting products specifically rated for the site conditions. For any ceramic tile install in Camps Bay, this level of preparation is non-negotiable if you expect the installation to last a decade or more without significant maintenance.
Professional contractors also carry workmanship warranties, which means if tiles lift or grout fails within the warranty period due to installation error, the fix is covered. That protection alone justifies the investment in qualified tradespeople over cheaper alternatives.
What Happens on Day 1: Surface Preparation and Layout Planning
Day 1 is the most underestimated day of the entire installation — and the most important. Everything that happens on Days 2 and 3 depends entirely on the quality of preparation done here.
Substrate Assessment and Repair
Before any tile goes down, the substrate — whether concrete screed, cement board, or existing tile — must be thoroughly inspected. Professional tilers check for hollow spots using a tapping method, identify any cracking or movement, test for moisture levels using a moisture meter, and assess surface flatness with a straight edge or spirit level. In Camps Bay homes, rising damp and historical moisture ingress are common findings, particularly in older properties near the beachfront.
Any cracks wider than 0.5mm require filling with a flexible repair mortar before tiling proceeds. Significant damp readings — typically above 75% relative humidity in the screed — mean installation must be delayed or a damp-proof membrane applied first. Skipping this assessment is what causes tiles to fail, and no reputable tiler will bypass it.
Waterproofing Membranes in Bathrooms and Wet Areas
In any bathroom, shower, or wet room in a Camps Bay home, a waterproofing membrane is mandatory — not optional. The most commonly used systems are liquid-applied polyurethane or acrylic membranes that are painted onto the substrate in two to three coats, with a fabric reinforcement layer embedded at wall-to-floor junctions and around drain penetrations. Each coat must be allowed to cure fully before the next is applied, which is why this step is completed on Day 1 and left to cure overnight before tiling begins.
A compliant waterproofing system in South Africa follows SANS 10021 guidelines. Professional tilers working in Camps Bay should be familiar with these standards and apply membranes that meet or exceed them, particularly in second-floor bathrooms where a leak can cause serious structural damage to the floor below.
Tile Layout Planning and Pattern Marking
Once the substrate is prepared and membranes are curing, the layout planning phase begins. This is where the visual result of the installation is determined. Professional tilers establish a working grid using chalk lines or laser levels, finding the true center of the room and working outward to ensure tile cuts are symmetrical and balanced at all visible edges.
Layout planning accounts for several critical factors that affect the final appearance:
- Door thresholds and transitions to adjoining floor finishes
- The direction of natural light, which influences whether horizontal or vertical tile orientation looks best
- Fixture positions such as floor drains, toilet bases, and bath pedestals
- Pattern repeat alignment for feature tiles or decorative inserts
- Grout joint width consistency across the entire installation area
This planning stage is where the difference between an amateur and a professional is most visible in the finished result. Rooms that feel balanced and considered — where the tiles feel intentional rather than just laid — are the product of careful layout planning done before a single tile is fixed.
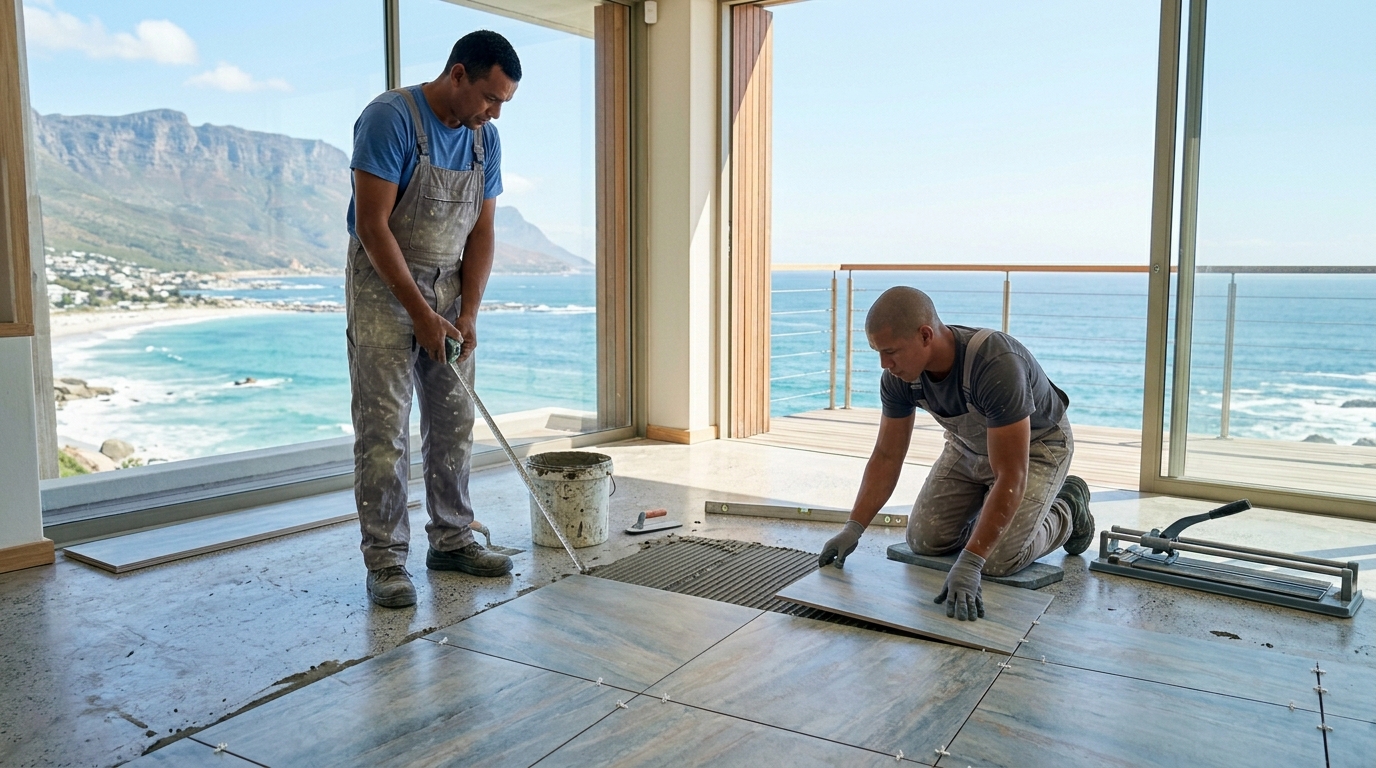
What Happens on Day 2: The Ceramic Tile Installation
Day 2 is where the transformation becomes visible — but the quality of this day’s work is entirely dependent on the preparation done the day before. With a solid, level, waterproofed substrate and a clear layout grid in place, an experienced tiling team can move efficiently and confidently through the installation without second-guessing decisions mid-process.
Adhesive Selection for Camps Bay’s Coastal Climate
- Flexible polymer-modified cement adhesive (C2TE rating) — the preferred choice for Camps Bay coastal conditions, offering high bond strength and flexibility to accommodate substrate movement
- Rapid-set adhesive — used when project timelines are tight or when installing in areas that need to return to service quickly, such as commercial kitchens or busy bathrooms
- Epoxy adhesive — specified for areas with continuous water exposure or chemical contact, such as pool surrounds and outdoor coastal terraces
- Large-format tile adhesive (LTFT-rated) — required for ceramic tiles larger than 600x600mm to prevent slippage and ensure full bedding coverage of at least 95%
The adhesive choice isn’t just a product preference — it’s an engineered decision based on the tile size, substrate type, area exposure, and expected movement. In Camps Bay’s coastal environment, a standard S1-rated flexible adhesive is the minimum specification for any interior wet area. For exterior tiles or pool-adjacent surfaces, an S2-rated adhesive offering greater deflection tolerance is the correct specification.
Adhesive is always applied using a notched trowel, with the notch size matched to the tile format. A 10mm notched trowel is typically used for tiles up to 400x400mm, while larger format tiles require a 12mm or 15mm notch to ensure sufficient adhesive coverage. Back-buttering — applying a thin skim of adhesive directly to the back of the tile before placement — is standard practice for tiles above 600x600mm and is essential in coastal environments where full bedding coverage prevents moisture from becoming trapped beneath the tile.
One detail that separates professional tilers from DIY attempts is open time management. Most cement-based adhesives have an open time of 20 to 30 minutes before they begin to skin over and lose bond strength. Working in Camps Bay’s warm summer conditions can reduce this window significantly, requiring experienced tilers to mix smaller batches and work in manageable sections to maintain consistent bond quality across the entire installation.
Precision Tile Cutting and Placement Techniques
Ceramic tile cutting in a professional installation is done using an electric wet-saw or an angle grinder fitted with a diamond blade — not a manual score-and-snap cutter, which is only adequate for simple straight cuts on standard-format tiles. Wet-saws allow for precision straight cuts, diagonal cuts, L-shaped notches around door frames and pipe penetrations, and curve cuts around toilet bases and bath pedestals. In Camps Bay homes where design expectations are high, these cuts need to be clean, consistent, and tight to the fixture — a 2mm gap at a toilet base filled with grout is the mark of careful, professional work. A 10mm gap filled with silicone is not.
Spacing, Leveling, and Pattern Alignment
Tile spacers are placed at every corner junction to maintain consistent grout joint width across the entire floor or wall. In residential Camps Bay installations, a 2mm to 3mm joint is standard for wall tiles, while floor tiles typically use a 3mm to 5mm joint depending on tile format. Leveling clips and wedge systems — such as the Raimondi or Kaufmann clip systems — are used by professional tilers to eliminate lippage between adjacent tiles, which is particularly important for large-format ceramics where even a 0.5mm height difference is visible and a trip hazard. Every few tiles, a spirit level or laser level is checked across multiple tile faces to confirm the plane remains true to the layout grid established on Day 1.
What Happens on Day 3: Grouting, Sealing, and Final Finishing
By Day 3, the adhesive has cured — typically requiring a minimum of 24 hours before grouting begins, though rapid-set adhesives can be ready in as little as 3 to 4 hours. Rushing this stage is a common mistake that causes grout to crack as the adhesive continues to cure and shift beneath it. A professional tiler will confirm cure status before proceeding, particularly in Camps Bay’s cooler winter months where curing times extend considerably.
Choosing the Right Grout for Coastal Conditions
Grout selection for a Camps Bay installation comes down to three key variables: joint width, area exposure, and aesthetic finish. For joints up to 3mm, an unsanded cementitious grout is appropriate. For joints between 3mm and 12mm, a sanded grout provides the structural body needed to prevent cracking. For continuously wet areas like showers, pool surrounds, and coastal outdoor terraces, an epoxy grout — such as Mapei Kerapoxy or Weber EP Joint — offers near-zero water absorption and exceptional resistance to the salt air and biological growth that accelerate standard grout degradation in coastal environments. Epoxy grout costs more and is more demanding to apply, but in a Camps Bay coastal bathroom, it’s frequently the right call for long-term performance.
Professional Grout Application and Cleanup
Grout is applied using a rubber float held at a 45-degree angle to the tile surface, pressed firmly into the joints to eliminate voids and air pockets. Excess grout is removed in diagonal strokes to avoid pulling grout out of the joints. Once the grout has reached its initial set — typically 15 to 30 minutes depending on product and temperature — the tile faces are cleaned with a damp sponge in circular motions, rinsed frequently to prevent grout haze from hardening on the tile surface. A final light buff with a dry cloth removes any remaining haze. All movement joints at wall-to-floor junctions and around fixtures are filled with a colour-matched silicone sealant rather than grout, allowing the substrate to move without cracking the joint.
The Real Cost of a 3-Day Ceramic Tile Install in Camps Bay
Tiling costs in Camps Bay sit at the higher end of the Cape Town spectrum, reflecting both the area’s elevated property values and the genuine technical demands of coastal installation. As a general benchmark, professional ceramic tile installation in Camps Bay ranges from approximately R250 to R450 per square metre for labour alone, excluding tiles, adhesive, grout, and waterproofing materials. Complex patterns, large-format tiles, and significant substrate repair work push costs toward the upper end of this range.
Factors That Affect Your Final Price
| Cost Factor | Impact on Price | Notes |
|---|---|---|
| Area size (m²) | Base cost driver | Larger areas reduce per-m² rate |
| Tile format (size) | Medium–High | Large-format tiles require more skill and time |
| Pattern complexity | Medium–High | Herringbone and diagonal add 15–25% to labour |
| Substrate condition | Variable | Repairs and leveling compounds add cost |
| Waterproofing requirement | Medium | Adds R80–R150/m² for membrane system |
| Adhesive specification | Low–Medium | Epoxy adhesive significantly more expensive than cement-based |
| Grout type | Low–Medium | Epoxy grout adds R60–R120/m² vs standard cementitious |
Professional Install vs DIY: Which Saves More Money
The honest answer is that DIY ceramic tile installation almost never saves money in Camps Bay — and frequently costs significantly more in the long run. The combination of coastal-specific product requirements, demanding substrate conditions, and the high finish expectations of Camps Bay properties creates a technical environment where mistakes are expensive and visible. A poorly laid floor in a R8-million beachfront home doesn’t just look wrong — it devalues the property.
Consider the real numbers. A DIY tiler renting a wet-saw, purchasing the correct coastal-grade adhesive, waterproofing membrane, leveling system, and grout for a 20m² bathroom is likely spending R6,000 to R9,000 in materials alone — before accounting for wasted tiles from cutting errors, which typically add 10% to 15% to material quantities for inexperienced installers. A professional team brings their own equipment, orders materials accurately, and completes the job in the three-day window without the extended disruption of a weekend DIY project stretched across three weeks.
Where DIY genuinely makes sense is in very small, low-risk areas — a simple laundry room splash back on a flat, solid substrate with no waterproofing requirement and a straightforward grid layout. Anywhere moisture is present, anywhere the substrate is complex, or anywhere the finished result is highly visible, professional installation is the financially sound choice. The workmanship warranty alone — typically covering 12 to 24 months with a reputable contractor — provides a safety net that no DIY project can offer.
How to Choose the Right Tiling Contractor in Camps Bay
Camps Bay has no shortage of people calling themselves tilers. The difference between a contractor who delivers a flawless 3-day installation and one who leaves you with hollow tiles and cracked grout within six months often comes down to a handful of verifiable credentials and the right questions asked before work begins. To ensure quality service, consider checking out tiling services in Camps Bay that are known for their expertise and reliability.
Credentials and Workmanship Warranties to Look For
In South Africa, professional tilers working on residential projects should hold registration with the Master Builders Association (MBA) of the Western Cape or operate under a registered building contractor. This registration signals that the contractor meets minimum trade standards and operates within an accountable framework. Ask to see proof of registration — any reputable tiler will have it on hand without hesitation.
Beyond registration, look for a written workmanship warranty of at least 12 months covering defects arising from installation error — not material failure, which is covered separately by the tile manufacturer. The warranty should specifically reference adhesive bond failure, grout cracking, and tile lippage as covered defects. A contractor who won’t provide a written warranty is telling you something important about their confidence in their own work.
Questions to Ask Before Hiring
Before signing any quote or paying a deposit, run through these questions with every contractor you consider:
- What adhesive specification do you use for coastal wet areas, and why?
- Do you apply a waterproofing membrane before tiling bathrooms, and which system do you use?
- How do you handle substrate repairs if defects are found on Day 1?
- What leveling system do you use to control lippage on large-format tiles?
- Can you provide references from previous Camps Bay or Atlantic Seaboard projects?
- Is your quote inclusive of adhesive, grout, and waterproofing, or materials only?
- What is your process if tiles are damaged during cutting or installation?
A contractor who answers these questions confidently and specifically — naming products, citing standards, and offering references without hesitation — is worth serious consideration. One who gives vague answers or seems unfamiliar with coastal-specific product requirements is a risk not worth taking on a Camps Bay property.
Your Camps Bay Ceramic Tile Transformation Starts Here
A 3-day professional ceramic tile install in Camps Bay is one of the highest-return home improvement projects you can undertake — increasing both the visual appeal and the long-term value of a property in one of Cape Town’s most sought-after coastal suburbs. When it’s done right, with the correct products, proper preparation, and a qualified team who understands the demands of coastal installation, the result lasts decades and requires minimal maintenance. If you’re ready to take the next step, ServiceLink SA makes it straightforward to connect with vetted, experienced tiling professionals across Camps Bay who can assess your space, provide a detailed quote, and deliver the quality finish your home deserves.
FAQ’s About Ceramic Tile Install in Camps Bay
Getting the facts straight before your installation begins saves time, money, and the frustration of avoidable surprises. These are the questions Camps Bay homeowners most commonly ask before committing to a ceramic tile project.
How many square meters can professional tilers complete per day in Camps Bay?
An experienced two-person tiling team working on a straightforward grid layout with standard ceramic tiles can typically install between 15m² and 25m² per day on Day 2 of the installation process. This rate drops to 8m² to 12m² per day for complex patterns like herringbone or diagonal layouts, which require more precise cuts and alignment checks throughout the process.
These figures are for the tile-laying phase only. Day 1 is dedicated to surface preparation and layout planning regardless of area size, and Day 3 covers grouting and finishing. Larger spaces — above 40m² — may extend the installation into a 4 or 5-day process without compromising quality, which is entirely normal for a professional project of that scale.
Do I need to waterproof before ceramic tile installation in a Camps Bay bathroom?
Yes — waterproofing is non-negotiable in any bathroom, shower, or wet room in a Camps Bay home. South African standard SANS 10021 requires waterproofing in all wet areas before tiling, and in coastal environments like Camps Bay where humidity levels are consistently elevated, skipping this step significantly accelerates tile bond failure and substrate damage. A liquid-applied membrane system applied in two to three coats with fabric reinforcement at junctions is the minimum compliant installation for a residential bathroom.
What ceramic tile sizes work best for Camps Bay homes?
For open-plan living areas and larger rooms common in Camps Bay properties, 600x600mm and 600x1200mm format tiles create a clean, contemporary look that suits the area’s architectural style and makes spaces feel larger. For bathrooms, 300x600mm wall tiles and 300x300mm or 450x450mm floor tiles offer practical cut efficiency with a refined finish. Mosaic tiles — typically 25x25mm or 48x48mm mounted on mesh backing — remain a popular choice for Camps Bay shower floors where slip resistance and drainage around the drain outlet are priority considerations.
How long should I wait before walking on newly installed ceramic tiles?
With a standard cement-based adhesive, newly laid ceramic tiles should not be walked on for a minimum of 24 hours after installation. With a rapid-set adhesive, light foot traffic is typically safe after 3 to 4 hours, though this varies by product and ambient temperature. In Camps Bay’s cooler winter months, extend the standard cure period to 36 to 48 hours to account for slower adhesive hydration in lower temperatures.
After grouting on Day 3, the grout itself requires 24 to 72 hours before the surface is exposed to water or heavy use, depending on the grout type. Epoxy grout cures faster than cementitious grout and is typically ready for water exposure within 24 hours. Full grout strength — and the appropriate time to apply a penetrating grout sealer — is reached at approximately 28 days after installation for cementitious products.
Can ceramic tiles be installed over existing tiles in a Camps Bay home?
It is technically possible to tile over existing tiles in a Camps Bay home, but it comes with specific conditions that must be met for the installation to be sound. Every existing tile must be fully bonded to the substrate with no hollow spots — any loose or hollow tiles must be removed and the area repaired before new tiles go over the top. The existing tile surface must also be thoroughly cleaned, degreased, and keyed with an angle grinder or bonding primer to provide adequate adhesion for the new tile adhesive.
The most significant consideration is floor height. Tiling over existing tiles adds 10mm to 18mm of height to the finished floor level, which can create problems at door thresholds, floor transitions, and bathroom fixtures. Foor ceramic tile install in Camps Bay homes with underfloor heating — increasingly common in high-end renovations — the additional thermal mass from a double tile layer also reduces heating efficiency and responsiveness.
![]()
Stop browsing and start enjoying your new floors.
LTCape Flooring installs premium ceramic tiles in just 3 days with a no-nonsense warranty.
Call now for your free on-site quote and professional installation.
- By: LTCape Admin" >LTCape Admin
- Tags: Best Affordable Tilers In Camps Bay, ceramic tile install camps bay open now, How much do tilers charge per m2?, online estimates ceramic tile install camps bay, Professional floor tiling contractors in Cape Town, Professional Tiling Services in Camps Bay, top rated ceramic tile install camps bay, What is the 1/3 rule for tiles?, What is the going rate for tiling per square meter in Camps Bay?, Which company is best for ceramic tiles?
- Category: Flooring for Coastal Homes
- 0 comment
Leave a Reply