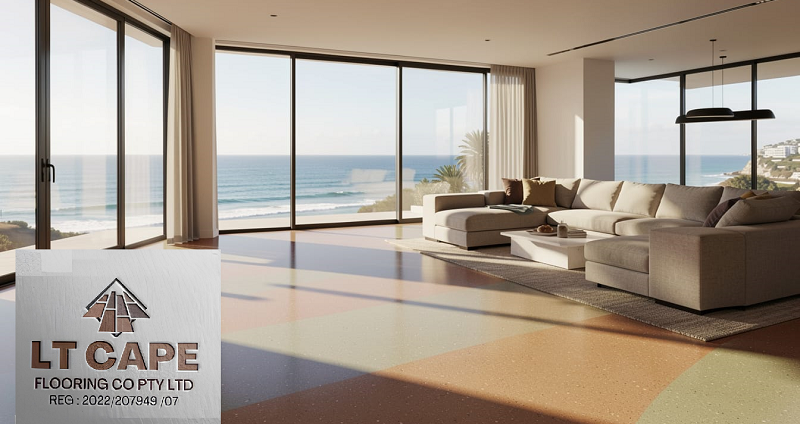
Colour Screed Leveling In Sea Point
Colour screed leveling for a Sea Point property typically involves preparing the concrete substrate, applying a decorative, high-strength cementitious screed, and sealing it with a protective topcoat. The process ensures a smooth, durable, and aesthetically pleasing finish, suitable for coastal, high-traffic, or residential spaces.
Key Takeaways: Colour Screed Leveling in Sea Point
- Colour screed leveling is a two-in-one flooring solution that levels uneven surfaces while delivering a finished, decorative look — no extra floor covering needed.
- Sea Point’s coastal salt air accelerates substrate moisture problems, making primer application and surface preparation more critical here than in inland areas.
- Self-levelling screed products like the ABE Fast-Track SLCP can be walked on in as little as 4–6 hours, making them ideal for occupied residential and commercial properties.
- Skipping the bonding agent or primer on a Sea Point floor is one of the most common — and costly — mistakes made during screed installation.
- LT Cape Flooring works with coastal properties across Cape Town, offering guidance on the right screed systems for Sea Point’s unique environmental conditions.
Getting colour screed leveling in Sea Point to the optimum state, isn’t just about aesthetics — the coastal environment changes everything about how you prepare, apply, and cure the floor.
Sea Point sits right on the Atlantic seaboard, which means floors in this area deal with salt-laden air, higher ambient humidity, and substrate moisture levels that can derail a screed job fast if you don’t plan for them. For contractors and property owners working in this suburb, understanding how the local environment interacts with screed chemistry is the difference between a floor that lasts decades and one that starts delaminating within months. LT Cape Flooring specialises in coastal flooring solutions across Cape Town and understands exactly what Sea Point properties demand from a screed system.
Sea Point Floors Need a Different Approach
- Higher relative humidity near the Atlantic coastline slows curing and increases blush risk
- Salt air penetrates porous substrates, weakening the bond between screed and concrete
- Older Sea Point apartment blocks often have aging concrete slabs with existing delamination or hollow spots
- Ground-level and basement floors face upward moisture migration from proximity to the water table
- Thermal cycling from ocean breezes causes more frequent expansion and contraction in floor substrates
Most screed failures in coastal areas come back to one root cause: moisture that was never accounted for at the prep stage. In Sea Point specifically, you’re dealing with a combination of ambient humidity and substrate moisture that can read deceptively low on a basic moisture meter, only to cause adhesion failure weeks after installation.
This doesn’t mean colour screed leveling in Seapoint can’t be done beautifully, it absolutely can. It just means your site assessment, product selection, and application process need to be sharper than they would be for an inland Johannesburg project.
Why Coastal Salt Air Affects Floor Preparation
Salt particles suspended in Sea Point’s air settle on floor surfaces and penetrate into open-pored concrete over time. When screed is applied over a salt-contaminated substrate without proper preparation, the salt crystals absorb moisture, expand, and physically push the screed layer away from the base. This process — called efflorescence-driven delamination — is slow but destructive. Grinding or shot-blasting the surface before priming removes contaminated material and gives your screed a clean, mechanically keyed surface to bond to.
Common Floor Problems Found in Sea Point Properties
Sea Point’s residential stock is a mix of mid-century apartment blocks and newer sectional title developments, and both come with their own floor challenges. Older buildings frequently show cracked or uneven concrete slabs, hollow-sounding areas where previous toppings have debonded, and surface contamination from decades of cleaning product use. Newer builds sometimes suffer from premature screed application over green concrete that hadn’t fully cured before the project timeline demanded finishing. Either way, a thorough floor survey using a hammer tap test and a calibrated moisture meter is non-negotiable before any colour screed work begins.
What Colour Screed Leveling Actually Is
Colour screed leveling is the process of applying a pigmented cementitious or polymer-modified screed layer to an existing floor to simultaneously correct surface irregularities and deliver a finished decorative surface. Unlike a standard grey leveling screed that acts purely as a sub-base for another floor covering, colour screed is the final floor. It’s mixed with integral pigments — iron oxide-based colorants being the most common — that become part of the screed matrix rather than sitting on top of it.
Self-Levelling vs Trowel-Applied Screed: Which One to Use
Self-levelling screed is fluid enough to find its own flat plane when poured, using gravity and flow to fill low spots without manual spreading beyond basic guidance with a gauge rake. Trowel-applied screed is stiffer, requires skilled manual finishing, and gives the applicator more control over texture and thickness variation. For most Sea Point residential and light commercial jobs, self-levelling colour screed is the preferred choice — it’s faster, produces a more consistent surface, and is far more forgiving on uneven substrates that are common in older coastal buildings.
That said, trowel-applied systems are worth considering when you need thickness above 50mm, or when you want a deliberately textured finish for slip resistance in wet areas like bathrooms or pool surrounds — both of which are common in Sea Point apartments with ocean-facing terraces.
How Colour Gets Added to Screed Mixes
Integral pigments are added during mixing, either pre-blended into a bagged product by the manufacturer or added as a separate liquid or powder colorant on site. Pre-blended bagged systems like the Build It Floor Screed SLC P 25 by ABE offer better colour consistency across a large pour because every bag contains the same pigment ratio. Site-added colorants introduce more variability — even a slight change in water content or mixing time can shift the final colour by a visible margin. For colour-critical projects, always specify a pre-pigmented bagged product and mix each batch for the same duration at the same speed.
Thickness Requirements for a Stable Colour Screed Finish
Minimum thickness for a self-levelling colour screed in a residential application is typically 3mm, but this is only viable over a substrate that is already flat and sound. On a real-world Sea Point floor with dips, humps, and surface damage, you’ll rarely be working at minimum thickness across the whole slab. A more practical planning figure is 6mm to 10mm average thickness, with localised depths up to 20mm over significant low spots. For more information on the materials and tools needed, you can visit BUCO’s screeds section.
Going below the minimum thickness in any zone creates a weak point that will crack under foot traffic loading. Going too thick in a single pour with certain products can cause shrinkage cracking as the screed loses moisture during curing. Always check the product datasheet for maximum single-pour depth — for the ABE Self Levelling Screed Fast-Track SLCP range, this figure determines whether you need a second pour for deeper corrections.
Reinforcing the screed layer is also worth considering for Sea Point floors that experience frequent thermal movement. A fibreglass reinforcing mesh or polypropylene fibres added to the mix can significantly reduce micro-cracking as the floor expands and contracts through seasonal temperature changes driven by Atlantic weather patterns.
- Minimum viable thickness: 3mm over a flat, sound substrate
- Practical average for real-world floors: 6–10mm
- Maximum single pour depth: check individual product datasheets
- Reinforcement recommended for coastal thermal cycling conditions
- Feather edges at doorways or transitions must be avoided — always use a screed stop bead
Step-by-Step Plan For Colour Screed Leveling in Sea Point
The following process applies to a standard Sea Point residential floor — concrete substrate, existing minor cracking and unevenness, and a target finish of a pigmented self-levelling screed as the final floor surface. Adjust product selections and curing times based on the specific conditions on your site.
Every step below is load-bearing in terms of the final result. Cutting corners at step one or two will not be compensated for by perfect execution at step four.
Step 1: Assess and Clean the Existing Floor Surface
Start with a full tap test across the entire floor — use a hollow-sounding hammer or a chain drag to identify delaminated or hollow areas. Mark every problem zone with chalk. Hollow areas must be cut out and filled with a compatible repair mortar before any leveling screed goes down. Next, grind the entire surface using a walk-behind floor grinder with a diamond segment head to remove laitance, contamination, and any existing adhesive residue. Vacuum the floor thoroughly and then wipe down with clean water to remove grinding dust. The surface should feel rough to the touch — like coarse sandpaper — which confirms adequate mechanical key for the primer and screed layers to follow.
Step 2: Prime the Substrate Before Any Screed Is Applied
Priming is the single most skipped step in DIY and rushed commercial screed jobs — and it’s the one that causes the most failures in Sea Point’s coastal conditions. A penetrating primer does two things simultaneously: it seals the substrate to control suction (preventing the concrete from pulling water out of the screed too fast, which causes surface cracking) and it creates a chemical bonding layer between the old concrete and the new screed. For Sea Point floors, specify a moisture-tolerant acrylic or epoxy-based primer that can handle residual substrate dampness without losing adhesion.
Apply the primer with a short-pile roller and work it into the surface thoroughly. On highly porous or dusty concrete, a second primer coat is often necessary — apply it while the first coat is still slightly tacky for best penetration. Allow full primer cure before proceeding. Rushing this stage by pouring screed over a wet or partially cured primer is one of the fastest ways to produce a screed floor that sounds hollow within weeks. On a humid Sea Point day, primer dry time can extend beyond the manufacturer’s stated figure — always test tackiness by touch rather than relying on the clock alone.
Step 3: Mix the Colour Screed to the Right Consistency
Water ratio is everything with self-levelling colour screed. Too much water and the screed becomes weak, prone to shrinkage cracking, and the pigment dilutes — producing a washed-out colour in the finished floor. Too little water and the product won’t flow properly, leaving drag marks and ridges that are impossible to correct once the screed begins to set. Follow the manufacturer’s water-to-powder ratio exactly. For the ABE Self Levelling Screed Fast-Track SLCP range, always add the powder to the water — not the other way around — and mix with a slow-speed drill and paddle mixer for a minimum of three minutes until the mix is completely lump-free.
Consistency check: pour a small amount onto a flat surface and watch how it flows. It should spread smoothly and self-level within 30 to 60 seconds without running excessively. If it stays in a mound, it’s too stiff. If it runs flat immediately and keeps spreading past a 300mm diameter puddle, it’s too wet. Batch consistency matters enormously for colour uniformity — use the same measured water volume for every bag, and never adjust mid-job unless you’re prepared for visible colour variation between pours.
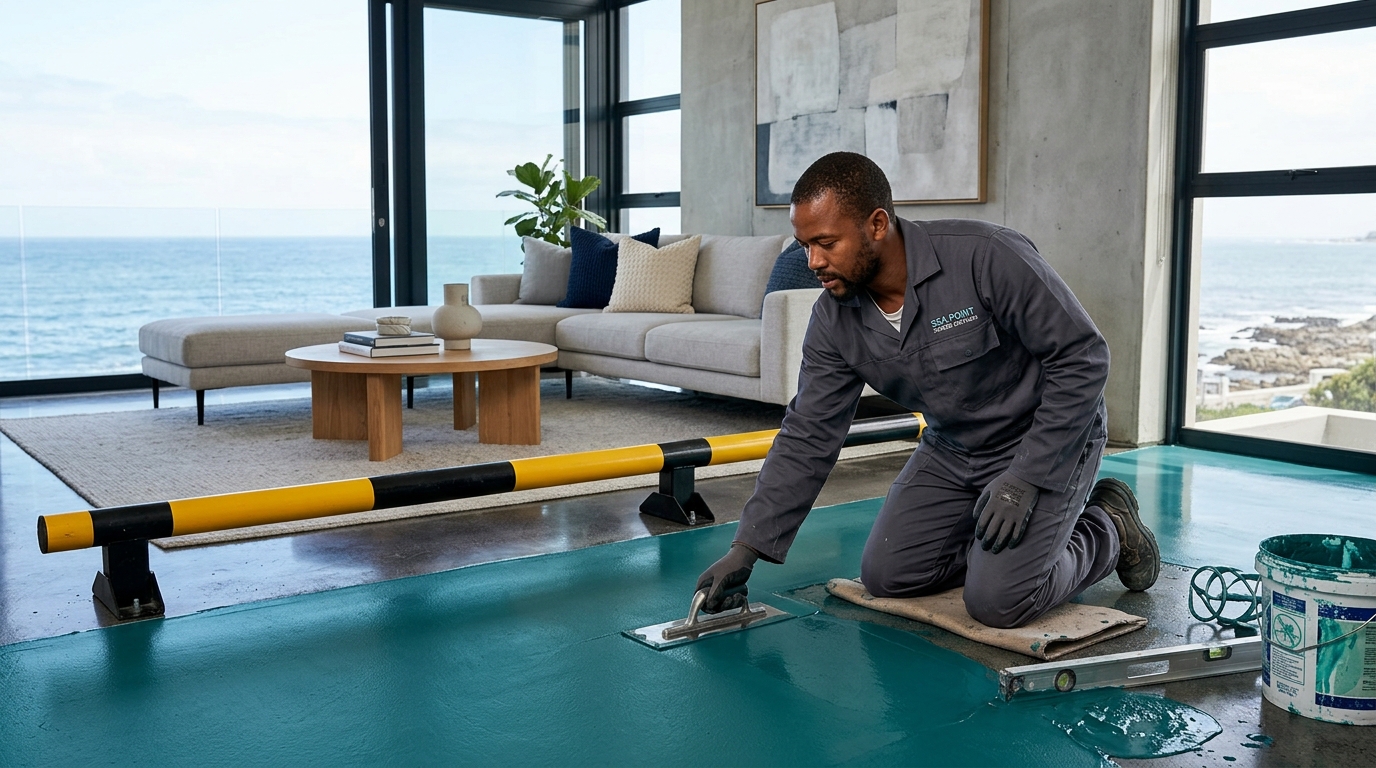
Step 4: Pour and Spread the Screed Across the Floor
Work from the furthest corner of the room back toward the exit. Pour each batch in a continuous ribbon overlapping the previous pour while it’s still wet — this is called a wet-on-wet application and it eliminates cold joints between batches. Use a gauge rake set to your target thickness to spread the screed evenly, then allow the product’s self-levelling properties to do the rest. Avoid over-working the surface with the rake, as excessive agitation introduces air bubbles and disturbs the pigment distribution. For larger Sea Point floor areas, a spiked roller run gently over the wet screed releases trapped air and produces a more uniform surface texture across the full pour.
Step 5: Allow Correct Curing Time Before Foot Traffic
The ABE Self Levelling Screed Fast-Track SLCP is walkable in 4 to 6 hours under normal conditions, and coverings can be applied after 12 to 24 hours. In Sea Point’s higher humidity environment, push both of these figures toward the longer end. Keep windows and doors open to maintain airflow, but avoid direct wind across the fresh screed surface — rapid surface drying causes plastic shrinkage cracking within the first hour of application. Never use heaters or fans directed at the screed to speed up drying. Let it cure naturally.
Best Screed Products Available in Cape Town
Cape Town’s building supply market has a solid range of self-levelling and colour screed products available through major retailers including BUCO and Build It, as well as specialist flooring suppliers. The products below are all confirmed available in the Western Cape and are appropriate for Sea Point’s coastal conditions when used with correct preparation and priming.
ABE Self Levelling Screed Fast-Track SLCP 15MPA 20kg
The ABE Fast-Track SLCP 15MPA is a single-pack, protein-free self-levelling screed that only requires the addition of water on site. Its 15MPa compressive strength rating makes it suitable for residential applications, and the fast-track formulation delivers walkability in 4 to 6 hours — a significant advantage when working in occupied Sea Point apartments where floor downtime needs to be minimised. It can be either pump-applied or hand-laid, which adds flexibility for jobs where access through a Sea Point building’s narrow corridors makes pump hose routing the more practical option. Available from BUCO from R245.19 per 20kg bag.
Tile Magic Screed Self Levelling 20kg TA-SLFS-20
The Tile Magic TA-SLFS-20 is a reliable, widely available self-levelling screed option stocked at BUCO locations across the Western Cape. It’s a straightforward single-component system — add water, mix, pour — and is well suited to residential leveling applications where the floor will receive a subsequent floor covering such as vinyl tile, ceramic tile, or laminate.
At R277.25 per 20kg bag, it sits in the mid-price range and represents good value for preparatory leveling work where colour is not the primary objective. It’s worth noting that if colour screed is the final finish, the Tile Magic TA-SLFS-20 would function as a base leveling layer under a pigmented topping rather than as the colour screed itself — a practical two-stage approach that many Sea Point contractors use to keep material costs manageable on larger floor areas.
Build It Floor Screed SLC P 25 by ABE
The Build It Floor Screed SLC P 25 is a 25MPa-rated self-levelling compound available through Build It stores in South Africa. Its higher compressive strength rating makes it appropriate for light commercial applications — think Sea Point ground-floor retail spaces, restaurant floors, or mixed-use building lobbies — where foot traffic loading exceeds standard residential levels. It shares the same quick-setting, dustless, single-pack characteristics as the broader ABE SLCP range, and its protein-free formulation ensures it won’t harbour bacteria, which is a relevant consideration for any Sea Point food service or hospitality project.
Mistakes That Ruin a Colour Screed Job in Sea Point
Most colour screed failures on Sea Point floors aren’t product failures — they’re process failures. The coastal environment amplifies every shortcut taken during preparation and application, and what might be a minor issue on a dry Gauteng inland floor becomes a guaranteed failure point on a building 200 metres from the Atlantic Ocean. Understanding where jobs go wrong is just as important as knowing the correct process.
Skipping the Primer on Porous or Dusty Floors
Unprimed porous concrete pulls water from the screed so fast that the mix can’t hydrate properly — the cement particles don’t fully activate, and the result is a weak, powdery surface that abrades under foot traffic. On a dusty or friable substrate, the screed bonds to the dust layer rather than the concrete, and the whole topping peels off as a single sheet when stressed. In Sea Point, where many older apartment slabs have been subjected to years of moisture cycling, this substrate weakness is far more common than it appears at first inspection. Prime everything — no exceptions.
Applying Screed in High Humidity Without Ventilation
Sea Point’s relative humidity, especially in winter and on overcast summer days with south-easterly winds, can sit above 80% for extended periods. Applying self-levelling screed in these conditions without adequate cross-ventilation slows surface curing dramatically and can cause surface blush — a whitish haze that forms when moisture is trapped at the screed surface during setting. Open windows on opposite sides of the room to create a through-draft, avoid application during rain or immediately after, and if humidity is consistently above 75% on your site, check the product datasheet for humidity restrictions before starting the pour.
Skipping the Primer on Porous or Dusty Floors
Unprimed porous concrete pulls water from the screed so fast that the mix can’t hydrate properly — the cement particles don’t fully activate, and the result is a weak, powdery surface that abrades under foot traffic. On a dusty or friable substrate, the screed bonds to the dust layer rather than the concrete, and the whole topping peels off as a single sheet when stressed.
In Sea Point, where many older apartment slabs have been subjected to years of moisture cycling and salt air penetration, substrate weakness is far more common than it appears at first inspection. Run a tap test across the full floor before committing to a product or schedule — if more than 10% of the surface sounds hollow, you’re looking at a full grind-and-repair stage before any primer or screed goes down. Prime everything, no exceptions, and apply a second coat on any area that absorbs the first application within 60 seconds.
Applying Screed in High Humidity Without Ventilation
Sea Point’s relative humidity, especially in winter and on overcast summer days with south-easterly winds, can sit above 80% for extended periods. Applying self-levelling screed in these conditions without adequate cross-ventilation slows surface curing dramatically and can cause surface blush — a whitish haze that forms when moisture becomes trapped at the screed surface during setting. Open windows on opposite sides of the room to create a through-draft, avoid application during rain or within 24 hours of a heavy downpour, and if on-site humidity is consistently above 75%, check the specific product datasheet for humidity thresholds before starting the pour. The ABE Self Levelling Screed Fast-Track SLCP range specifies application conditions clearly — working outside those parameters voids the expected performance characteristics of the product.
Your Sea Point Floor Is Ready for the Long Haul
A properly executed joobb for colour screed leveling in Sea Point will outlast most other flooring systems by years — provided the preparation, priming, mixing, and curing steps are followed without shortcuts. The coastal environment is demanding, but it’s entirely manageable when you treat it as a known variable rather than an afterthought. Seal the finished floor with a UV-stable, moisture-resistant topcoat, re-apply the sealer every two to three years in high-traffic areas, and the floor will hold its colour, flatness, and integrity through Cape Town’s full range of Atlantic weather conditions.
FAQ’s About Colour Screed Leveling in Sea Point
Here are answers to the most common questions about colour screed leveling in Sea Point and Cape Town’s broader coastal environment.
How long does colour screed take to dry in Cape Town’s coastal climate?
Under standard conditions, fast-track self-levelling screeds like the ABE Fast-Track SLCP are walkable in 4 to 6 hours and ready for floor coverings or sealing in 12 to 24 hours. These figures assume a substrate temperature of around 20°C and relative humidity below 75%.
In Sea Point’s coastal climate, particularly during Cape Town’s winter months or on high-humidity summer days, extend both of these figures toward the longer end of the range. Humidity above 75% noticeably slows surface cure, and cold substrate temperatures below 10°C can extend full cure time significantly — in some cases doubling the standard drying period.
Never test dryness by appearance alone. A colour screed floor can look dry and still carry enough residual moisture to cause adhesion failure if a topcoat or floor covering is applied too early. Use a plastic sheet moisture test — tape a 500mm x 500mm sheet of clear plastic to the floor surface and check for condensation after 24 hours. A dry result confirms the floor is ready for the next stage.
Can colour screed be applied directly over old tiles in Sea Point homes?
Yes, but only if every tile is fully bonded, with no hollow or loose tiles present anywhere on the floor. Any hollow tile must be removed and the void filled with repair mortar before screed application. Loose tiles will flex under load and crack the screed above them regardless of how well the screed was mixed or applied. Grind the tile surface lightly to remove glaze and create mechanical key, then prime with a tile-compatible bonding primer before pouring the colour screed. In Sea Point apartments where lifting old tiles means disturbing waterproofing membranes or dealing with asbestos-containing adhesives in pre-1990s buildings, screeding over sound existing tiles is often the most practical and safest approach.
What is the minimum thickness for self-levelling colour screed?
The minimum application thickness for most self-levelling screeds is 3mm, but this only applies over a substrate that is already flat, sound, and fully prepared. On a typical Sea Point residential floor with real-world surface variation, a practical minimum planning thickness is 6mm averaged across the full floor area.
Going below 3mm in any zone — particularly at high spots on the existing slab — creates a section of screed that lacks the structural depth to resist cracking under normal foot traffic. Use a long straightedge or laser level across the full floor before mixing any screed to identify your highest point, and set your gauge rake depth from that reference so you never fall below minimum thickness anywhere on the pour.
For floors requiring corrections deeper than 40mm to 50mm in localised areas, a two-stage approach is more appropriate: fill the deep sections with a compatible repair mortar or base-layer screed first, allow full cure, then apply the colour screed as a uniform final layer over the entire floor. This produces a more consistent colour result and avoids the differential shrinkage cracking that can occur when thick and thin sections of colour screed cure at different rates side by side.
Does salt air in Sea Point affect how screed cures?
Salt air doesn’t directly interfere with the hydration chemistry of the screed itself, but it contributes to the ambient humidity conditions that slow surface curing. More critically, salt that has already penetrated the substrate over years of coastal exposure can cause efflorescence — salt crystals migrating upward through the screed as it cures — which shows as white surface deposits and can disrupt the bond between the screed and any topcoat or tile adhesive applied over it. Grinding the substrate before priming removes the salt-contaminated surface layer, and using a penetrating primer creates a barrier that limits further salt migration into the new screed layer.
Where can I buy colour screed products in Cape Town?
The ABE Self Levelling Screed Fast-Track SLCP 15MPA 20kg and the ABE Fast-Track SLCP 25MPA 20kg are both available through BUCO stores in the Western Cape, with prices starting from R245.19 and R293.93 per bag respectively. The Tile Magic Screed Self Levelling 20kg TA-SLFS-20 is also stocked at BUCO from R277.25 per bag. The Build It Floor Screed SLC P 25 by ABE is available through selected Build It stores in South Africa.
For specialist colour screed systems, pigment additives, compatible primers, and topcoat sealers, a specialist flooring supplier will carry a broader product range than a general building merchant. Specialist suppliers can also advise on pigment matching for large multi-room pours where colour consistency across different batches is critical — a common requirement in Sea Point apartment renovations where the screed runs through open-plan living, dining, and kitchen areas as a single continuous floor.
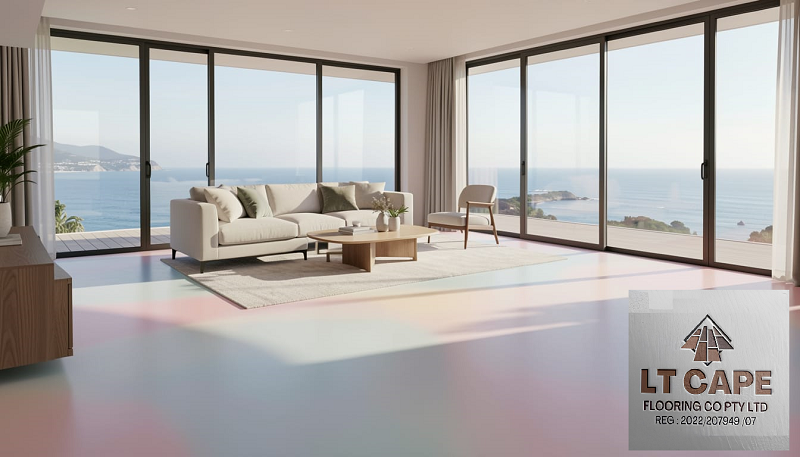
Perfect floors start with perfect leveling.
LTCape Flooring creates custom plans forr colour screed leveling in Sea Point homes.
Contact us today for professional floor preparation.
- By: LTCape Admin" >LTCape Admin
- Tags: Can you color screed?, coloured self leveling screed, How much does a 20kg screed cover?, How much is self-leveling screed?, sea level marks on buildings, self leveling screed colours south africa, what colour is screed, What does screed cost per m2?, what is levelling screed
- Category: Flooring for Coastal Homes, Flooring Solutions Cape Town
- 0 comment
Leave a Reply